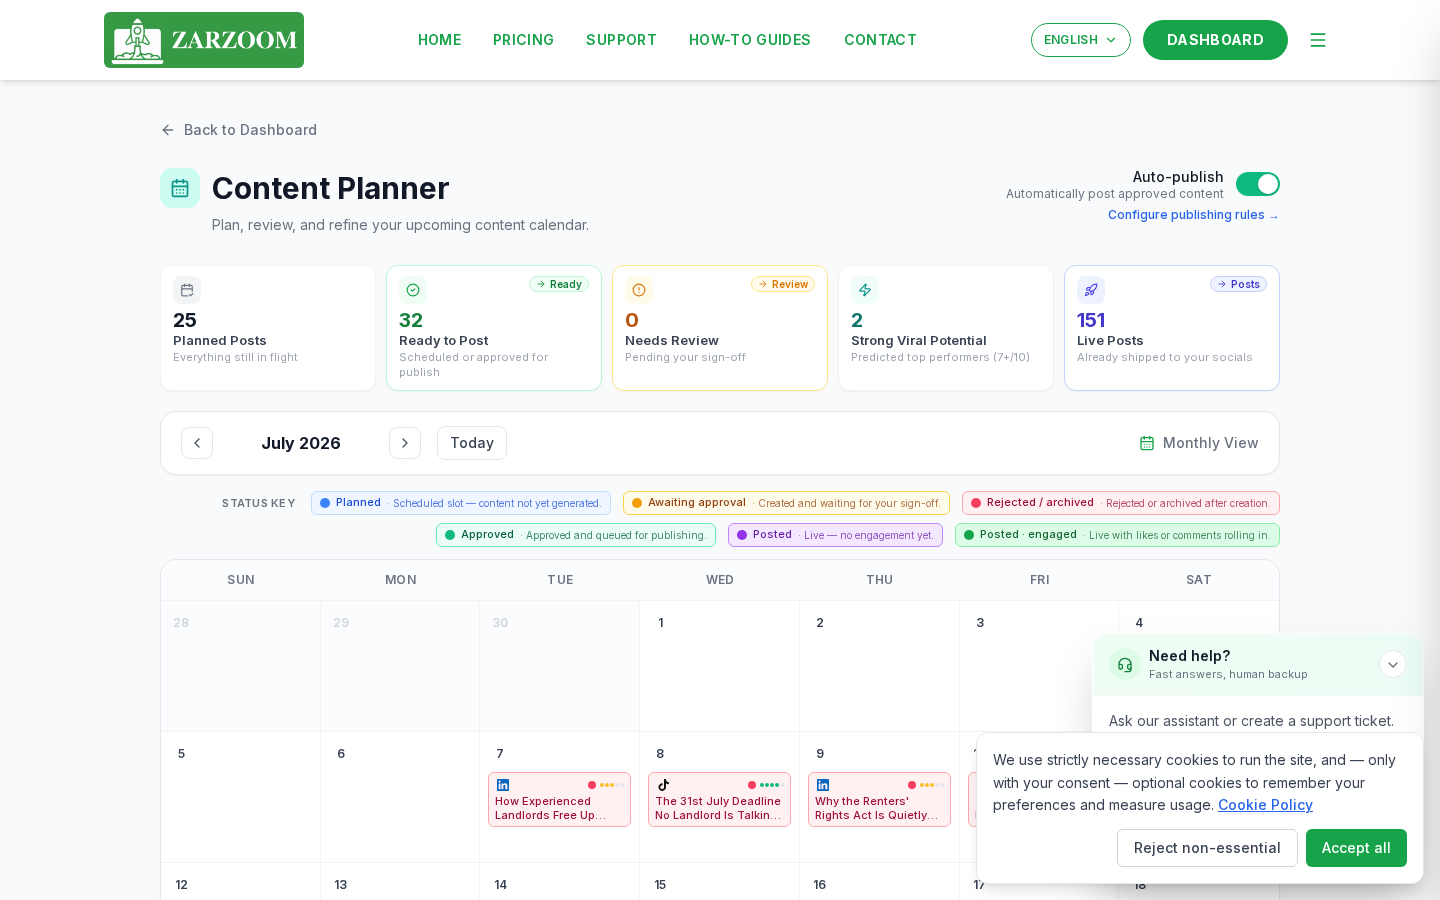
Step 1: Open the Content Planner
From your ZARZOOM dashboard, select Content Planner in the left-hand navigation menu. The planner opens in calendar view, showing the current month by default. Use the arrow controls at the top of the calendar to move between months, or select Week or Day from the view toggle to narrow your focus.
Step 2: Understand the status colours
Each item on the calendar is colour-coded to show its current status:
- Grey – Draft. The item has been created but not yet submitted for approval.
- Amber – Pending. The item is in the approval queue awaiting your review.
- Green – Approved. The item has been approved and is ready to publish.
- Blue – Scheduled. The item is approved and queued to go live at a set date and time.
- Red – Rejected. The item was returned during review and requires changes.
Step 3: Open an item to edit it
- Locate the item on the calendar.
- Click or tap the item to open its detail panel on the right-hand side of the screen.
- Select Edit to open the full editor.
- Make your changes to the copy, media, hashtags, or scheduled time.
- Select Save Draft to keep your changes without submitting, or Submit for Approval to move the item into the approval queue.
Step 4: Work through the approval queue
- Select Approval Queue in the left-hand navigation menu. All items with an Amber (Pending) status are listed here in chronological order.
- Click any item to open its preview, which shows the post exactly as it will appear when published.
- Review the content, then choose one of the following actions:
- Approve – moves the item to Approved (Green) status and marks it ready to publish.
- Reject – returns the item to Draft (Grey) status. You may add a note explaining what needs to change before resubmitting.
- Repeat for each item in the queue.
Step 5: Set the auto-publish toggle
- Open any Approved or Scheduled item from the calendar or approval queue.
- In the item's detail panel, locate the Auto-Publish toggle.
- Switch the toggle on to allow ZARZOOM to publish the post automatically at the scheduled date and time without any further action from you.
- Switch the toggle off if you want to publish the post manually. When the scheduled time arrives, the item will remain in an Approved state until you return to it and select Publish Now.
- Select Save to confirm your choice.
Good to know
- Status changes are immediate. Approving or rejecting an item in the queue updates its calendar colour in real time, so your planner always reflects the current state of your content.
- Auto-publish applies per item, not globally. You can have some posts set to auto-publish and others set to manual within the same calendar — check each item individually if you need precise control over what goes live automatically.
- Rejected items do not disappear. They remain on the calendar in Red status so you can find them easily, edit them, and resubmit without losing the original scheduled slot.